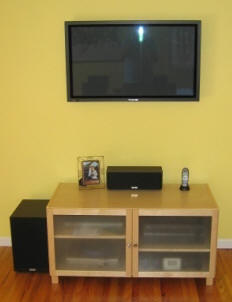
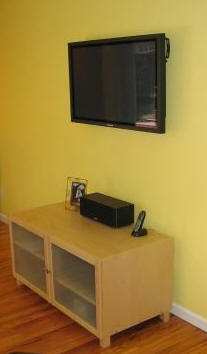
Until recently, my home theatre components were on one of those glass and black metal $200 racks, with ugly exposed wiring.We decided to put our house on the market, and I decided this was not going to be good enough, so I undertook this project. Mainly it was to show off the house, and the fact that we’re selling the 42″ Panasonic wall-mounted plasma with the house.Our floors throughout the house are oak, and all cabinetry is maple, so I wanted a way of matching that scheme, and having as little exposed wiring as possible. The plasma was prewired in the wall for power and picture, and all surround speakers were similarly prewired (as was coax, phone, Ethernet, and ATSC antenna.).
The components that need to fit in this system are:
- Yamaha RX-V1400 Home Theatre receiver
- Hughes HD DirecTiVo HR10-250
- Monster HTS-3500 MKII PowerCenter
- NeuNeo HVD108 – High Definition DVD player
There must also be room for the following components, which I sometimes use:
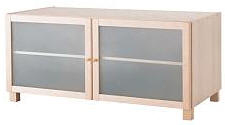
Starting off the project was easy, we went to IKEA and bought the $99 Benno. After carefully wiring the many connections into this case with no back access (no easy feat!), I discovered the obvious: Even on a cool day, the case got far too warm to close it, and the home theatre receiver was overheating the case, making the temperature sensitive (it has a hard drive) DirecTiVo too hot.

So armed with my knowledge of convection, and my vast experience buying too many fans in my neverending quest to quiet my computer, I realized that I would need to install a cooling system into the cabinet.
Fan notes:- Variable speed fans are not quieter, except at their lowest speed and voltage.
- I used to think PAPST fans were the cats’ meow, but CoolerMaster makes an entire line of inexpensive case fans that achieve similar sound performance.
|
My fans of choice are the extremely low revolution rate Ultra Silent 120mm fans from CoolerMaster ($14.95 from Central Computer). These are rated at 0.21 A and 13 dBA (certainly quiet), and 12V operating voltage. These are not variable speed (see note).

I picked up two fans, coupled with a RadioShack 12V 500mA supply (80 mA is enough overhead, I figured).

The next part was working out the airflow. The case is almost sealed (How would this work for almost anyone?), so I knew that my holes and ventilation system would be able to control the airflow well.
Intake had to be near the bottom of the case and not visible. Given the positioning in the room, I chose the back of the case for the intake, since it was thin particle board (IKEA!). The central divider goes nearly all the way between front and back, neatly dividing the cooling job into two sections. At the back, the shelves do not make it all the way to the back, allowing a lot of air to come up. There is also a small gap between the doors and the front of the shelves.
Outlets were also at the back, by process of elimination.
I drilled a set of 16 or so 1″ holes along the top of the case for outlets.
On the outside edges of the case, at the bottom, I put the fans, which were inlets (always use positive pressure to move air if you can).
This system is very effective at keeping the case cool, and the look is clean and matches the house. If you put your hand over any of the outlet holes, there is a constant airflow of relatively cool air. Feel free to use it or comment on it.


